Popular Posts

Friday, January 18, 2013

Here is a new clock I just made this week.
It has been made from very weathered old timber which has been cut into segments like slices of a pie, and glued to a plywood back. The big nuts and bolts are very old recycled brass, and have been screwed into drilled holes with screw threads cut into the hard wood. The clock is brand new with a clear white face behind a domed glass front. It runs on a single AA battery.
It will likely soon be for sale in The Collective Store in Wynnum, Brisbane Australia.

Friday, January 4, 2013

Making of a Mechanical shark.
This Shark sculpture is just under 500mm long and is made from aluminium and copper and recycled machine parts. The underlying structure and shape is formed from wood. This gives a strong light, easily formed body which makes it easy to nail and screw other parts on to it. The nails have domed heads which simulate rivets for that classic industrial appearance.
I started with a block of pine and sketched the basic shape I wanted onto it and sawed off the excess wood.
Next the shape is formed using an angle grinder fitted with a flap disk which is like a regular grinding disk with strips of sandpaper attached, it works very efficiently and is an excellent way to shape wood.
The fins, tail and lower jaw are made separately and attached later, after they have been covered with the metal.
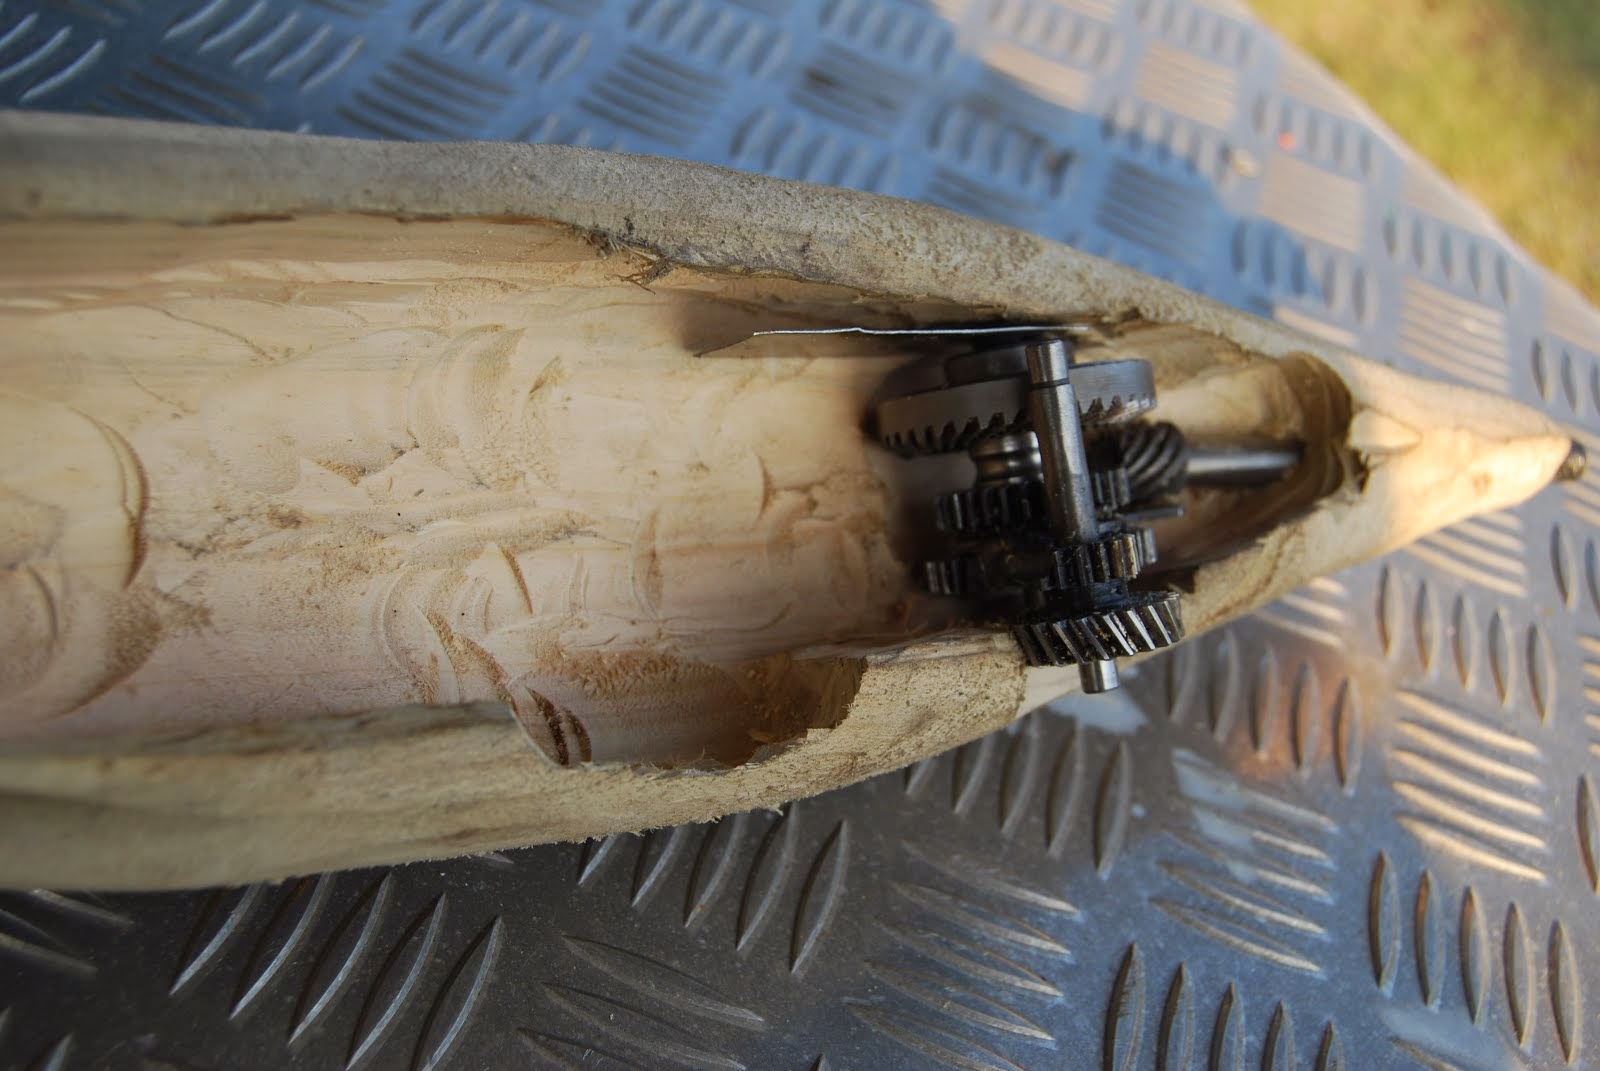
The inside of the shark was hollowed out using a router. The way I did it requires experience and very great care and is not recommended for anyone as it can be extremely dangerous. Probably a burr on a good Dremel type tool and one of those oscillating cutter things would be better.
Various bits and pieces were added to the inside, always keeping in mind what will be visible when finished.
This part was carved out of an old carburettor using the same flap sander. Pretty much a waste of time as it really can't be seen. I thought the throttle flap would look cool in the throat of the shark but near impossible to see.
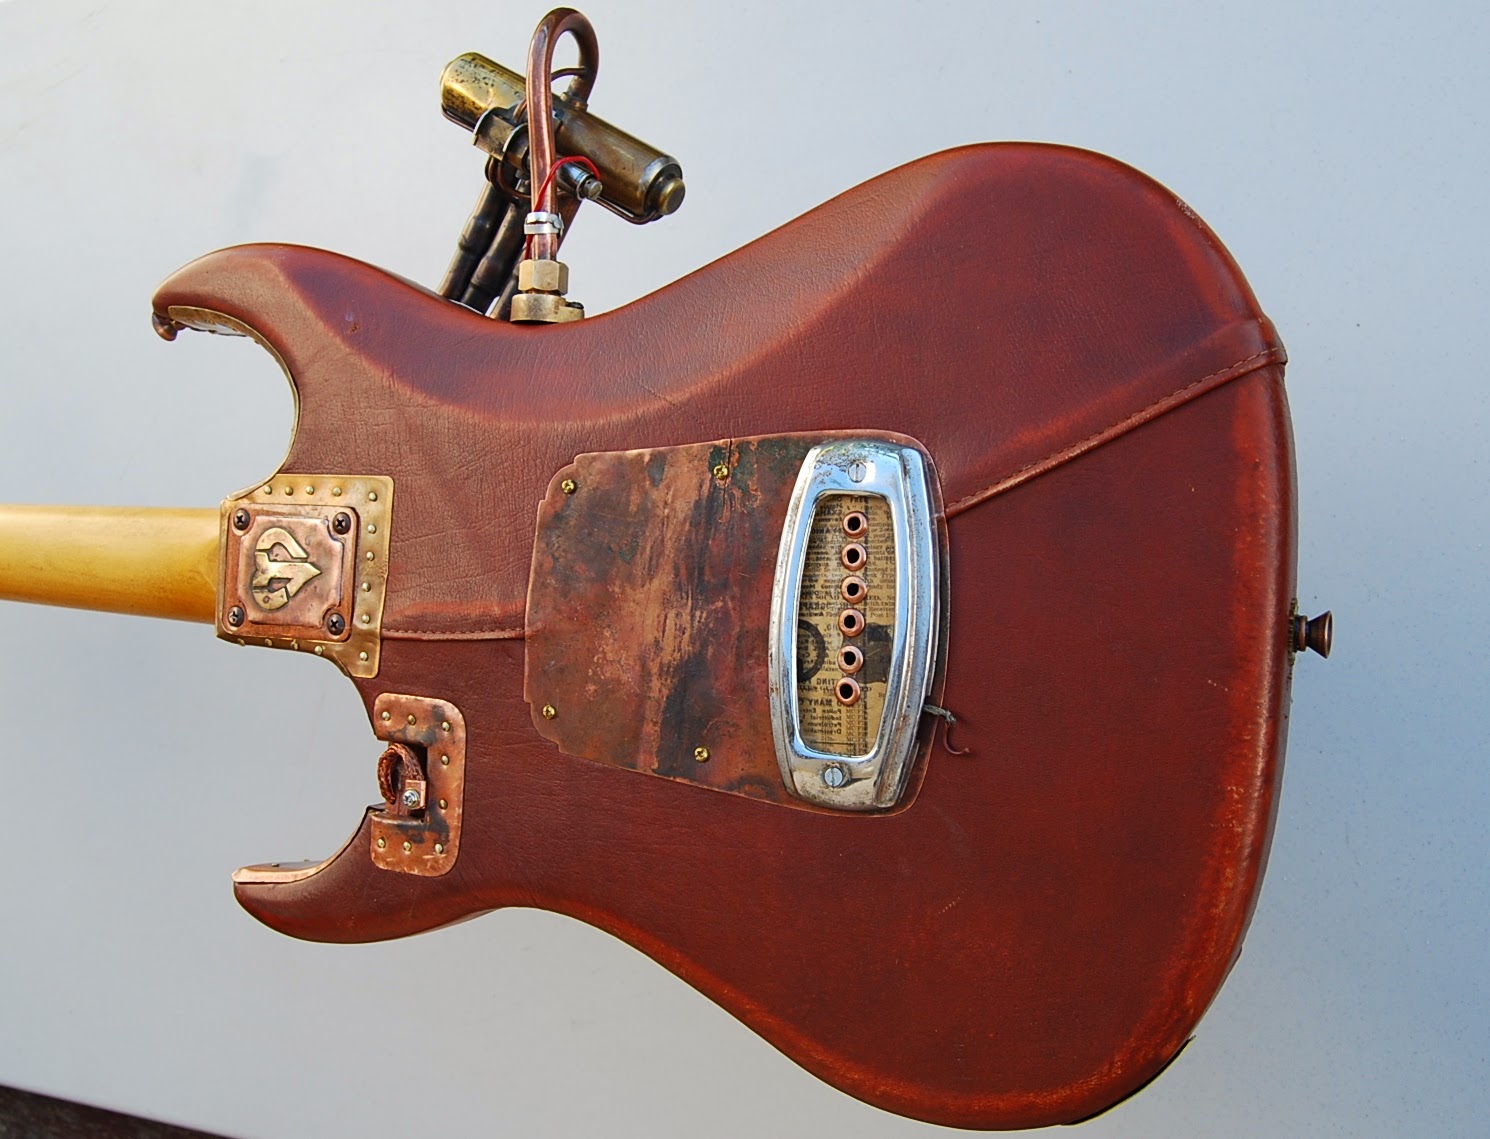
Unfortunately I forgot to take photos for the fitting of the metal parts. Basically I gradually hammered the metal to the shape of the wood and nailed them on.The metal on the fins and tail is riveted all round the edges. The back fin is screwed on from inside the sharks back. The tail and fins are dowelled and glued on and attached with nailed on plates. The mouth was lined inside the head and inside the lower jaw. The teeth was cut into the lining metal in the head and the outer covering of the jaw. and then nailed and glued on. The eyes are made from those grey glassy beads called haematite. I discovered a great product called Rust Guard in the form of a clear aerosol varnish. It says it will seal the metal surface to prevent rust and tarnishing and also makes it very glossy.Maybe too glossy?

Monday, August 27, 2012

I just made another clock. This one is a very simple design, but a fair bit of work involved.
I started by making a pair of brass wings. First I annealed the brass to make it soft enough to form and then drew the wings on the reverse side.The design was based on similar tiny brass stampings which are commonly available.
The wings were fairly easy to make but did require a LOT of hammering, I think about an hour and a half for each wing.The clock mechanism is an "insert" type which makes for easy installation and reliability. You simply cut a hole the right size and push the complete clock in.I placed the wings in position beside the clock and tacked them lightly to hold them temporarily and then drew around them and the clock.The cutting was mostly done with a scroll saw. After sanding and staining, the wings were permanently nailed on. The thingy on the back is mounted so that it hangs at an angle as if flying away.If need be it could easily be moved to allow the clock to hang horizontally. I really like it, I'm trying to decide whether to sell it or keep it.

Tuesday, August 14, 2012

Here is my latest Steampunk clock.
It is based around an old automotive spotlight.The first job was to modify it so that the front can be easily opened for easy battery replacement and resetting of the time. I used my trusty angle grinder to cut off the lip of the main light part which the clamp would normally attach to and then silver soldered an old hinge to the lamp and the first clamp.
The clock mechanism is screwed to a metal disc, which was cut to fit the rubber mount, and clamped into place.I also had to learn to cut glass circles to put a plain glass at the front where the spotlight bulb was originally.
I welded a washer into the base to attach a bolt for mounting to the base, and drilled and tapped a thread in the cast aluminium stand. I found that when the front was opened it would not stand up so I had to make a wooden base attached by screws.I also attached a magnet to keep the front closed and a couple of knobs on the outside. As you can see there was a lot of time and effort involved, glass cutting, silver soldering, welding, routing, thread tapping, mounting of the mechanism etc.I think it turned out pretty good.

Monday, August 13, 2012

My electric guitar in my previous post is currently in the window of The Collective store in Wynnum,Brisbane. I am currently their "featured Artist" which gives me the prime spot in the window and a big poster with a bit of an interview about me and my work.Apparently it has created quite a bit of interest and continues to bring new customers through the door. I needed something interesting for the window display in addition to my guitar and a few of my tools, so I decided to make a steampunk inspired clock.
It turned out quite nicely although was very time consuming...more on that later. It also sold very quickly, in fact two women tried to buy it at the same time and it nearly caused a fight in the shop! It's pretty cool for a maker to have customers fighting over your stuff! Anyway I needed something else to fill the gap in the window and so I made this clock also.
It is now also in The Collective store in Wynnum.It is made from a variety of bits and pieces.It has a lot of things which move and can be fiddled with, levers and knobs and turning cogs etc. I particularly like the "joystick" thingy made from a glass bead and a clock part handle.

Monday, April 30, 2012

This is my latest project. Steampunk - industrial electric guitar.
I know it's not strictly steampunk, with the aluminium etc but I had to call it something and I thought it would still appeal to the same crowd. (Actually I think it would technically be called Dieselpunk). It has taken several weeks to do. It takes a while to accumulate suitable bits and pieces and to do good art (if that is what this is?) I find I need to have plenty of time to contemplate and consider and experiment. It is a fairly gradual process. Some projects seem to take forever and others stall virtually at the idea stage and never get completed. This one progressed quite well over several weeks.
I used leather on the back.I wanted old worn looking leather. Around here it is pretty easy to get hold of old leather lounge suites for free or almost free, Usually when they are a few years old and looking very dated or when the dog has eaten part of it. I also rubbed and buffed this leather back after it was installed to give a worn look.
I made a little heart shaped brass logo for the neck mounting using my J-O initials.
Some bits of metal were new but most were quite old and had already been discarded by previous owners in the past. Most of it is made from various old bits and pieces scrounged from wherever I could find them.The idea is to use unusual pieces from a wide range of sources and modify them so that they aren't easily recognizable. Some bits may be vintage of iconic an then it's ok for them to be recognizable. I try not to use anything too rare or collectable in it's own right.
I was lucky to find some copper sheet which was already quite old and heavily patina-ed already.
Now I need someone to tune it up and see how well it plays. I can't play a note myself, but was careful to ensure that everything is still use-able. There's a video clip below of "Paul" from Guitar World, demonstrating a guitar of the same model as this one was, so hopefully it should still play something like that. This is my first attempt at modding a guitar, but hopefully not the last.

Saturday, April 21, 2012

Not much to say about these, just a few quick pendants I made recently to sell in the shop. Nice double sided cast faux keys. I am currently making a highly modified steampunk-ish electric guitar. Kind of aged relic industrial style with lots of brass and copper. Not really steampunk but should appeal to the same crowd. Sorry no photos until it's finished!